DTF Transfers
DTF Transfers
For fabric
UV DTF Stickers
UV DTF Stickers
For glass, metal, wood & other hard flat surfaces
Support
Support
Latest from the Studio Blog
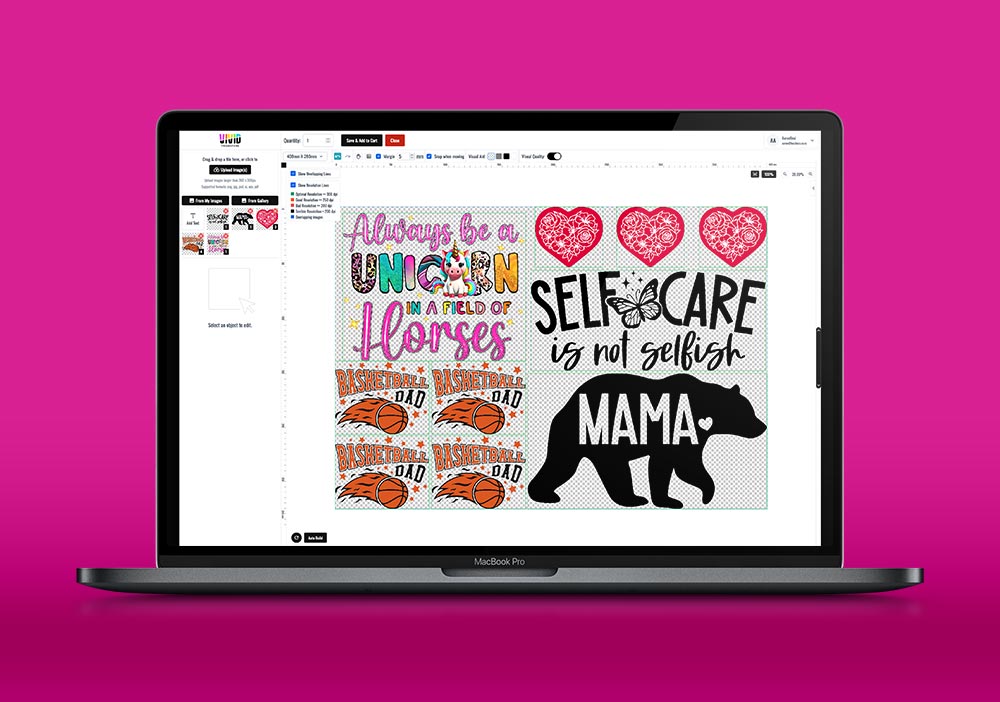
At VIVID Transfers, we're always striving to make your creative journey smoother and more cost-effective. That’s why we’re thrilled to introduce our latest innovation – the Gang Sheet Builder software. Whether you're designing custom DTF Transfers or custom UV DTF Stickers, this tool is designed to help you get the most out of your printing experience. It’s more than just a tool; it's your new secret weapon for crafting professional designs while keeping your budget in check.
The Gang Sheet Builder allows you to upload multiple designs onto a single print sheet, making it easy to maximize your print space and minimize waste. No more worrying about paying for extra sheets when you can efficiently arrange your designs on one. The flexibility of the Gang Sheet Builder means you can take on projects of any size—whether you need just a few stickers or a large batch of transfers, our software has you covered. Plus, you’ll have the added satisfaction of knowing you’re saving money by making the most out of each sheet.
Navigating to our Gang Sheet Builder is simple and user-friendly. When you visit our website, you’ll find the tool under either 'DTF Transfers' or UV DTF Stickers sections. Simply choose whether you want to work with DTF Transfers or UV DTF Stickers, and select the Create a Gang Sheet Builder option. From there, you can select the print size you want to start with and the type of film. (DTF: Standard, Glitter or Glow) (UV DTF: Standard or Gold). You'll also be reminded of the key file requirements before jumping in. Make sure you're files have a transparent background, are a file format that the we support and the file dimensions are large enough to fit your selected print size. Once you enter the builder you can upload your images, arrange them as you see fit. The interface is intuitive, making it easy for anyone—from seasoned designers to beginners—to create a print-ready file in no time.
To get the most out of the Gang Sheet Builder it's best to login to your VIVID Transfers account before you begin. Once the Gang Sheet Builder loads up you're presented with a menu where you can start with a brand new Gang Sheet project/order, open a previously ordered Gang Sheet or Auto Build. As a bonus, if you've already started working on a project you also have the option of continuing! Lets get familiar with a few of the key areas of the Builder, see the screenshot below:
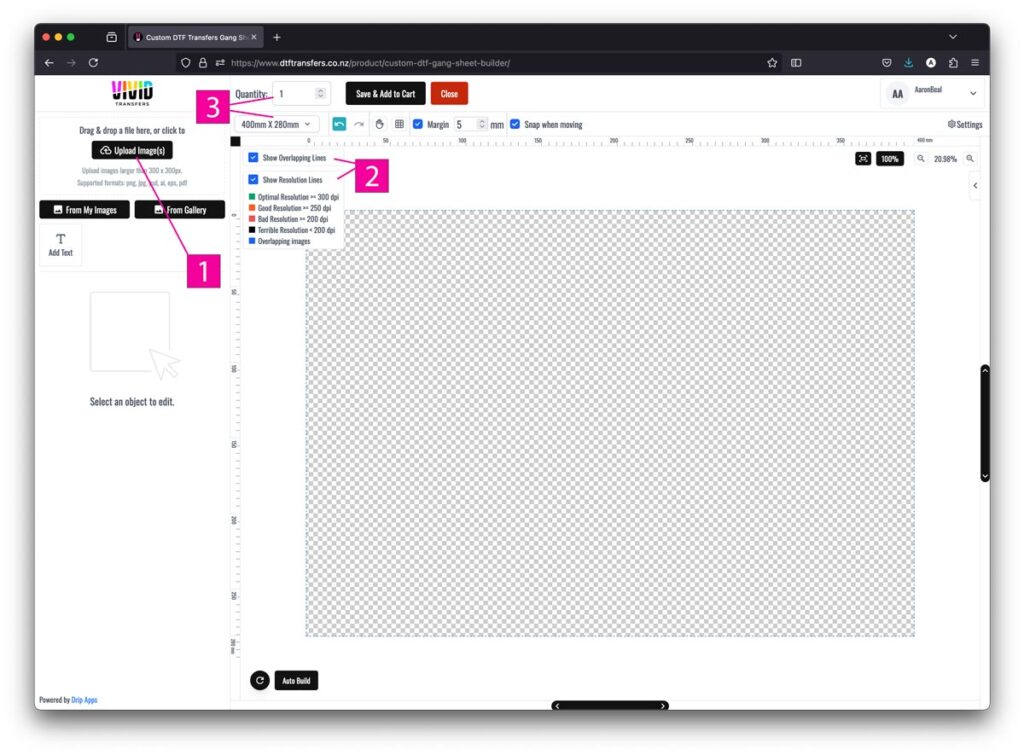
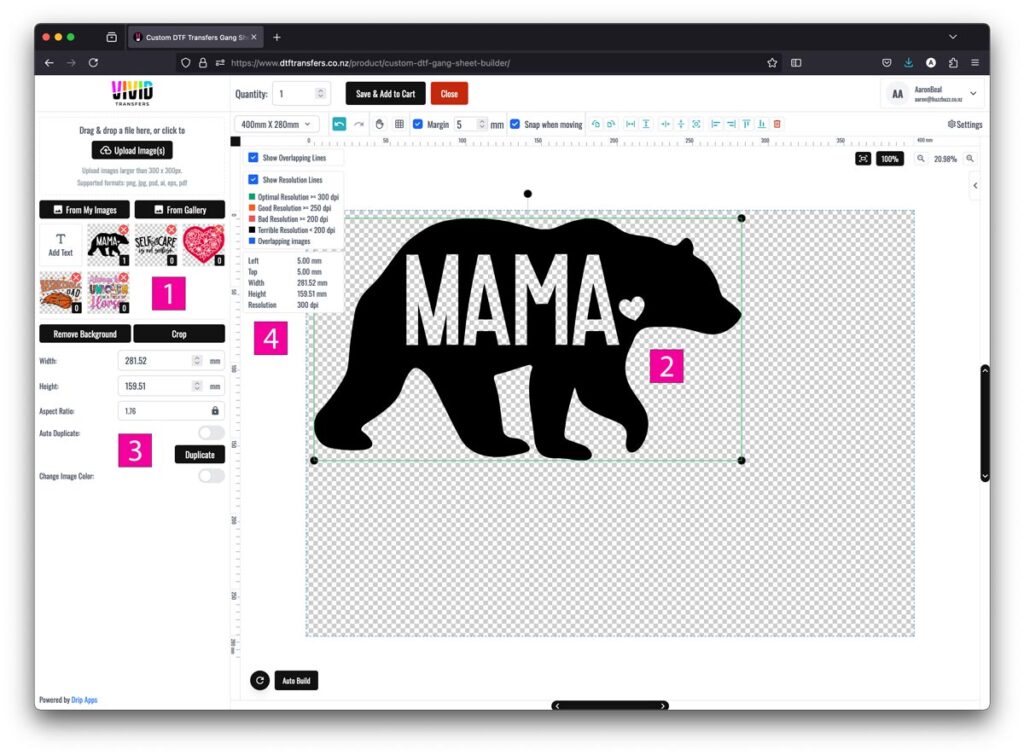
Lets upload a couple of images and start creating our Gang Sheet.
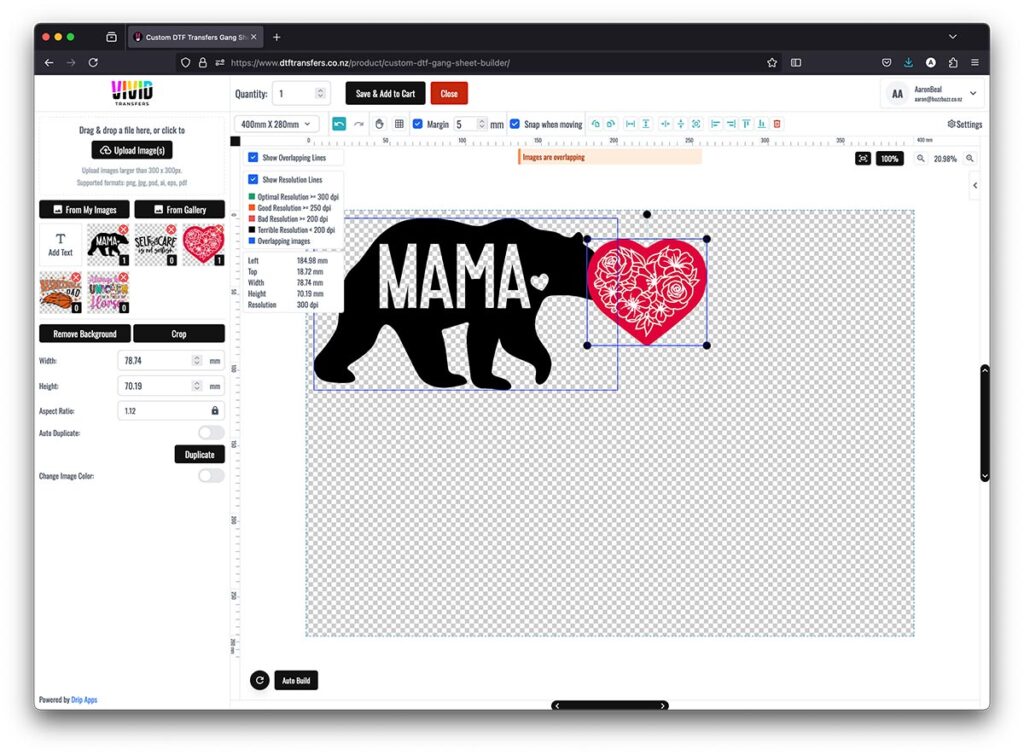
As you can see from the screenshot above I have added another image to the print area but it's sitting on top of another image. The builder will notify you of the issue by way of a warning message and blue line around the images that are overlapping. To fix the issue, select one of the images in the print area and click-n-drag it to a different space on the print area.
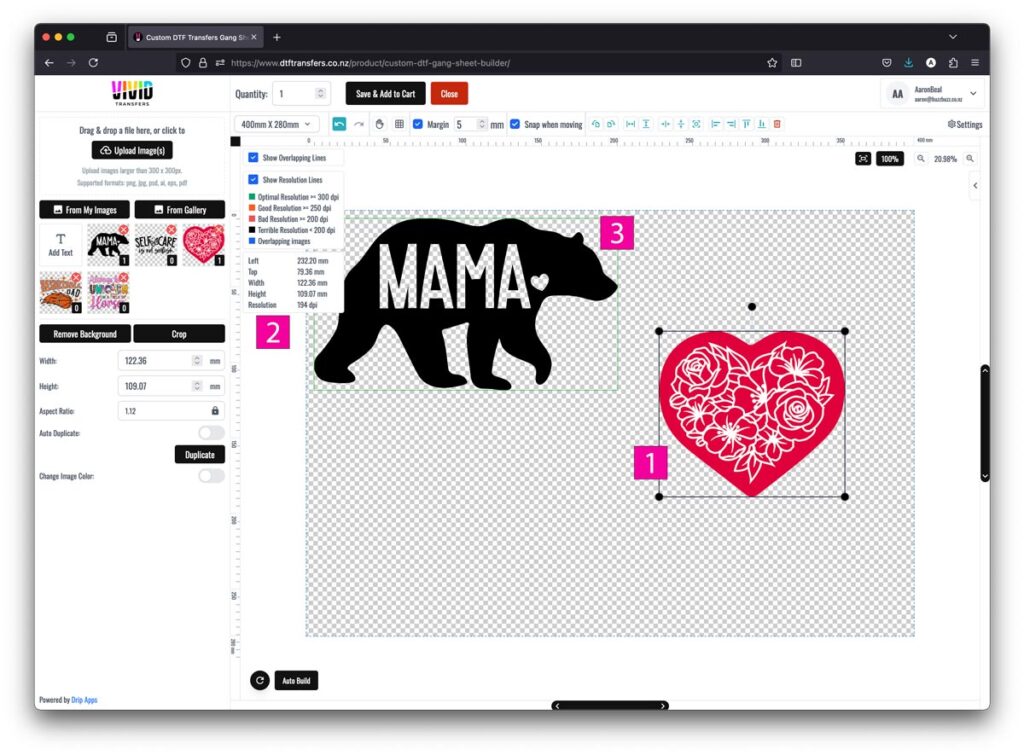
If at any point you're not happy with an image on the print area, select the image and press 'Delete' on your keyboard or the Trash icon at the top of the Builder. The image will still be in your uploaded library on the left-hand side of screen.
Lets add more images to our Gang Sheet now and fill the available space.
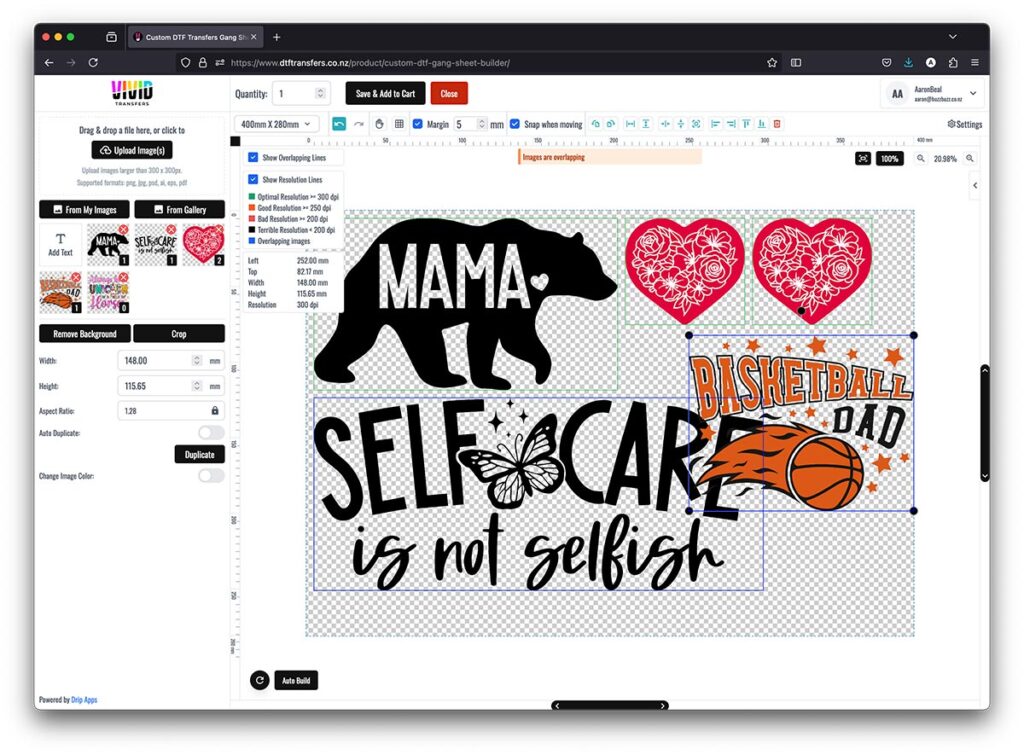
Uh-oh! We've run out of room. My selected print area is A3 (400mm x 280mm) but I clearly need more space. Click on the Canvas Size drop-down menu and select a larger size canvas, in this case the 'Per Meter' option.
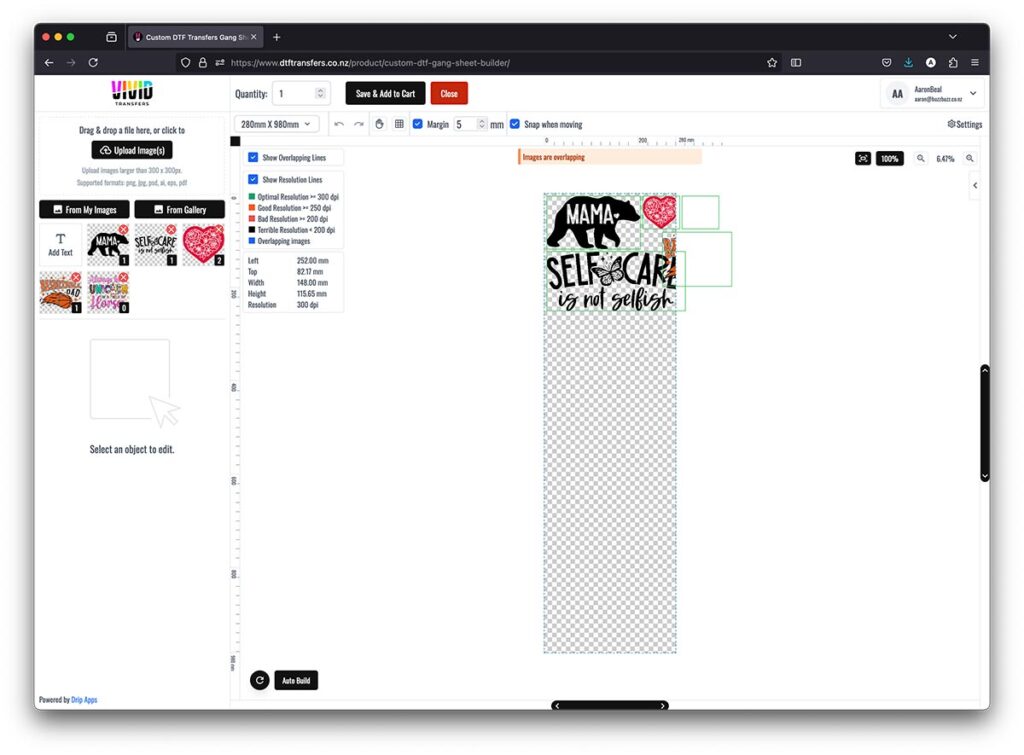
Great! Now we have more space to add more designs. After increasing or decreasing a canvas size you'll need to re-arrange the images so they fit in the print area.
Optional: You can also click on the 'Auto Build' button at the bottom of the Builder to help you arrange your images. A new window will open where you can specify the number of each image and their sizes among other things. When ready click the 'Apply' button and watch the magic happen!
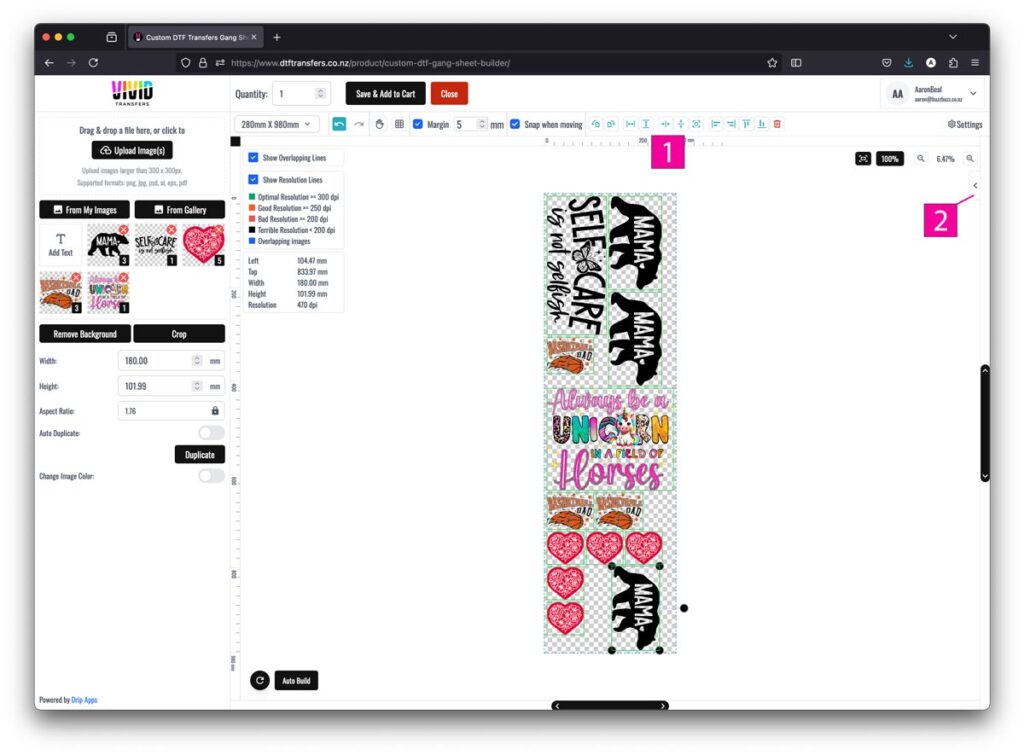
When you're happy with your Gang Sheet(s), simply click the 'Save & Add to Cart' button found at the top of the Builder. Your Gang Sheet is converted into a Print-Ready file and added to the Cart. Once in the Cart you'll be able to preview your Gang Sheet(s) and if necessary still be able to edit the file.
There are numerous advantages to using the Gang Sheet Builder, beyond just the obvious cost savings. One of the most significant benefits is the built-in design checker, which ensures your files are transparent and the correct size before you finalize your order. This feature helps you avoid costly mistakes and guarantees that your finished product looks as professional as possible. Additionally, by consolidating your designs onto a single sheet instead of multiple smaller sizes, you're not just saving money on printing costs—you’re also reducing your environmental impact by minimizing waste.
Whether you're a small business owner looking to streamline your operations or a hobbyist who enjoys creating personalized items, our Gang Sheet Builder is an invaluable tool. Start exploring the possibilities today and see how easy it is to create stunning, high-quality transfers and stickers with VIVID Transfers.
